Making a Smart Contract for a To-Do App Using Solidity.
Learn Solidity. Building projects in a new language is the greatest method to learn it.
Building projects in a new language is the best way to learn it, especially if you're just beginning to learn.
In the middle of a grueling workday, I attempted to construct a Solidity-based To-Do App. I was able to create a user-friendly one in under 30 minutes with only 22 lines of code.
Arrays and their methods, setter and getter functions, events, and more will be covered in this course. All of this will be done in the Solidity programming language.
You may learn more about Ethereum Blockchain Development and Solidity by visiting this page.
Introduction to the tutorial
There will be a constructor and four functions for adding, removing, and getting tasks in our program.
Although this is a beginner-friendly course, some familiarity with Solidity, such as data types and value types, is required.
We'll be using the web-based Remix IDE for this project. Our program can be quickly deployed for training purposes thanks to the built-in JavaScript VM.
Let's get this party started.
Let's start
Defining The Smart Contract
// SPDX-License-Identifier: GPL-3.0
pragma solidity >=0.5.16 <0.9.0;
To begin with, the EVM is notified that this source code is licensed under the GNU General Public License (GPL).
Next, the code must be written in a version of Solidity that is at least up to but not including, Solidity 0.9.0 in order to make sure that it will work.
TodoList will be the name of our contract, which will include all of the application's code.
// SPDX-License-Identifier: GPL-3.0
pragma solidity >=0.5.16 <0.9.0;

contract Todolist {}
Storing Our Task
Making a To-Do list helps us keep track of all the things we need to get done. Arrays of the type, string will be used to hold our tasks.
NB: An array of various kinds of data is not possible. The items of an array must all be of the same type.
// SPDX-License-Identifier: GPL-3.0
pragma solidity >=0.5.16 <0.9.0;

contract Todolist {
   string [] private allTasks;
}
We've given our list of strings the name allTasks and set its visibility to private so that only the Todolist contract can see it. The variable cannot be accessed by other contracts on the blockchain.
Tasks can be added to the list.
Let's add some tasks to the array.
Adding Tasks to the Array
In adding tasks, we will need a function that will take the particular task we want as a parameter and the particular process of adding the tasks in the function body. This is very simple.
 function addTask ( string memory taskName) public {
     allTasks.push(taskName);
}
The addTask function above takes an input called taskname with the type string, it then adds the task to our allTasks array declared earlier.
Just as in JavaScript,push is an array method that pushes values to the last value of an array.
The first value can be assessed with [0], the second with [1], and so on.
In Solidity, the addTask function can be termed as a setter function since it is used to set values to an array.
We will soon write a getter function that will get us all the tasks we've input.
Note that in Solidity, Function parameters are declared the same way as variables.
Removing Tasks from the Array
In removing tasks, we will need a function that will take the position ( ie 0 for first, 1 for second ) particular task we want to remove as a parameter and the particular process of removing the tasks in the function body. This is also very simple.
Our parameter will be the position of the item we want to remove from the list. Its type will be an unsigned integer, uint, we will name the integer as _taskNumber.
For our arguments, we will use the delete array method. delete looks for the particular item we need and squashes it from our list. The pop array method, however, gets rid of the last item in our array.
This is how it is done in Solidity.
 function removeTask(uint _taskNumber) public {
       delete allTasks[_taskNumber];
   }
Deleting all tasks from the array
To delete all the tasks, we don't need any parameters, all we need to do is run the delete on our array in a function and that's it.
  function deleteAllTaks () public {
      delete allTasks;
   }
Getting all tasks from the array.
To implement this we need a getter function that will return all the elements in our array.
function getAllTasks () public view returns( string [] memory) {
       return allTasks;
   }
**NB: Functions can also accept different keywords. Our getter function above has the view keyword.
View functions can read contract storage, but can’t modify the contract storage. Therefore, they are used for getters. **
In Solidity, you can return values from functions to the user if these functions are declared view
Putting it all together
// SPDX-License-Identifier: GPL-3.0
pragma solidity >=0.4.22 <0.9.0;

contract Todolist {

 string [] private allTasks;

   function addTask ( string memory taskName) public {
     allTasks.push(taskName);
   }

   function getAllTasks () public view returns( string [] memory) {
       return allTasks;
   }

   function removeTask(uint _taskNumber) public {
       delete allTasks[_taskNumber];
   }

   function deleteAllTask () public {
      delete allTasks;
   }
Let's try this in Remix.
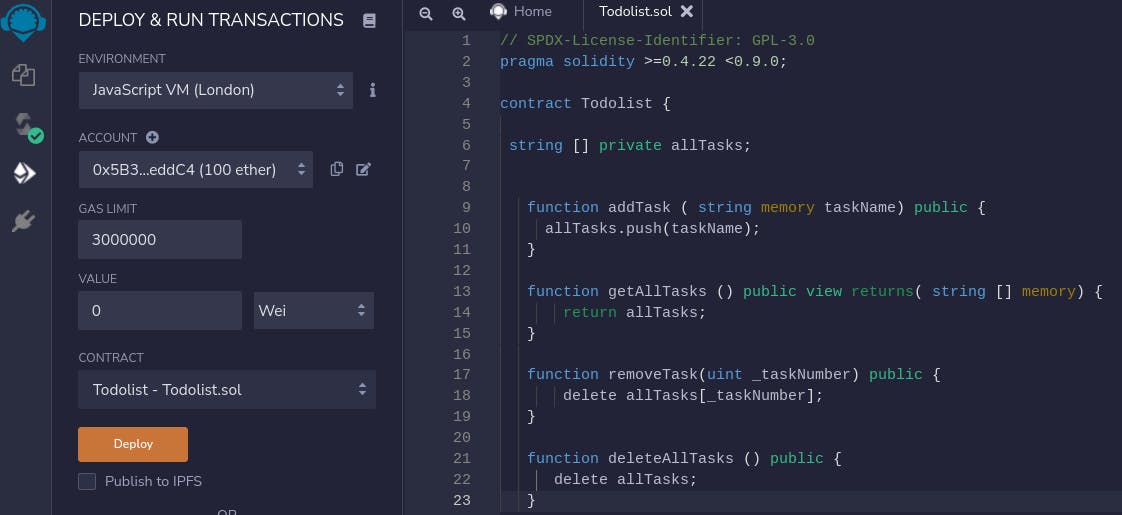
On the sidebar, make sure the code has been successfully compiled before you hit deploy
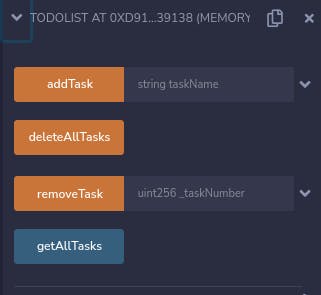
On deployment, we can see that the addTask and removeTasktake parameters as input.
Let's type some todos and run the ``addTask``` function.
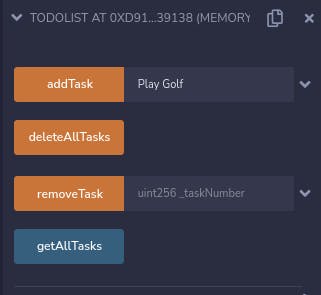
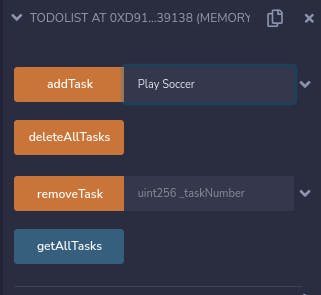
We've now successfully added 2 ToDos to our array. When we run the getAllTasks getter function, it should return "Play Golf" and "Play Soccer" as outputs.

Let's try and remove the first item from our list. (Position [0])
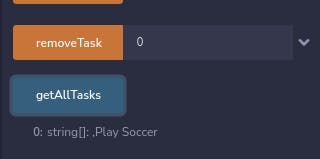
When we input 0 and run removeAllTask, the first task is deleted. Running the getter function now returns only one task.
Lastly, running the deleteAllTask clears our array to default with no values.
We've successfully completed our ToDo List, but there is one flaw. Anyone interacts with our application which makes it less secure.
Let's add some security measures.
This is where the constructor and error handling come in.
The Constructor
Constructor is a special function declared using the constructor keyword. It is an optional function and is used to initialize the state variables of a contract.
- A contract can have only one constructor.
We will use the constructor to set the owner of the contract. Access will be explicitly given to this owner to make sure, only they can successfully interact with the functions.
Let us declare a state variable of type address and name it owner.
address private owner;
- A constructor code is executed once a contract is created and is used to initialize the contract state.
Within the constructor, we will set the owner of the smart contract to the person that deploys the contract.
address private owner;

constructor () {
    owner = msg.sender;
}
NB: In Solidity, msg.sender will be the person who's currently connecting with the contract.
Let us now ensure that only the owner of this contract is permitted access.
When another address tries to communicate with the smart contract, we want it to return an error.
When it comes to this, the require statement comes into play.
Error Handling with the require() statement
The require() Solidity function guarantees the validity of conditions that cannot be detected before execution. It checks inputs, contract state variables.
It takes two parameters :
//pseudocode here (not actual code)
require( user == owner , "You are not the owner");
Require function takes 2 arguments separated by a comma. The first input is the condition needed to continue running the function. The second input is return when the condition is not met.
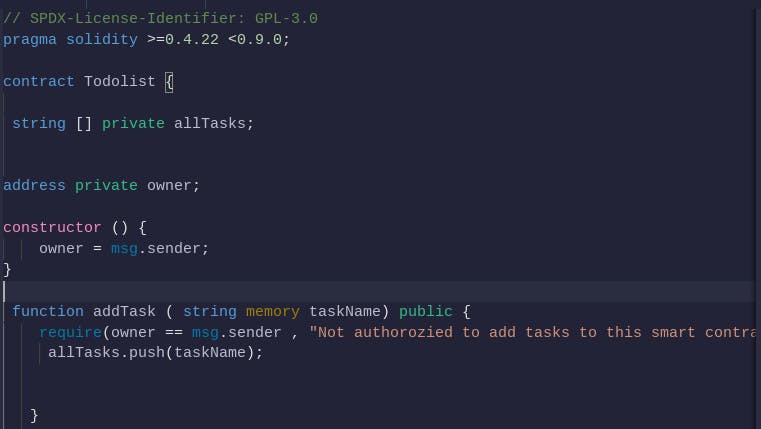
Let's apply this to the addTask() function in our ToDo List contract.
 function addTask ( string memory taskName) public {
 require(owner == msg.sender , "Not authorizied to add tasks to this smart contract");
 allTasks.push(taskName);
   }
The code above will check whether the person interacting with the smart contract at the time i.e msg.sender
Let's try it in Remix.
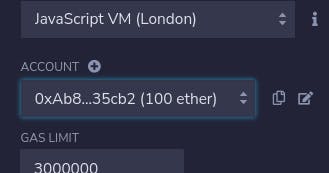
Switch to the JavaScript VM, select the first account and hit deploy!
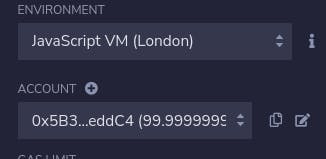
Now switch to the second address account and try to add a task to the contract. The transaction will fail!

Within the console, we can see a failed transaction that has returned the second argument we specified in the require() function.
For the sake of completeness and security, we'll now use require statements in all our functions.
// SPDX-License-Identifier: GPL-3.0
pragma solidity >=0.4.22 <0.9.0;

contract Todolist {

address private owner;

constructor () {
    owner = msg.sender;
}

 string [] private allTasks;

   function addTask ( string memory taskName) public {
     require(owner == msg.sender , "Not authorizied to add tasks to this smart contract");
     allTasks.push(taskName);
   }

   function getAllTasks () public view returns( string [] memory) {
       require(owner == msg.sender , "Not authorizied to view tasks in this smart contract");
       return allTasks;
   }

   function removeTask(uint _taskNumber) public {
       require(owner == msg.sender , "Not authorizied to delete tasks from this smart contract");
       delete allTasks[_taskNumber];
   }

   function deleteAllTaks () public {
      require(owner == msg.sender , "Not authorizied to empty tasks on this smart contract");
      delete allTasks;
   }
}
Conclusion
And with that, we've created a simple smart contract that doubles as a ToDo list.
Data types, arrays, getters and setters, error handling, and constructors have all been discussed at length in the tutorials.
These are found in almost every Solidity-based smart contract.
Using GitHub, I've uploaded the code I've used to develop this locally. You can find it on this page.

