How to Make Your First Open Source Contribution: A Beginner's Guide
This tutorial will teach you how to create your first open source contribution and a new pull request, the easier way.
Joining a community of talented software developers is one of the best ways to unlock your potential and push yourself as a developer.
Open source provides a platform for multiple people to collaborate, connect, and share ideas in order to improve a project.
As a beginner developer looking to expand your skill set, open source provides the benefits listed above.
This tutorial will teach you how to create your first open source contribution and a new pull request.
What exactly is a pull request? A pull request (PR) is simply a request from you (the contributor) to the repository (maintainer) to pick up and merge your changes/contributions.
Prerequisite
- A Github account
- A basic understanding of Git and Version Control
- VS code
To make our first contribution, we will use a live project initiated by Marko Denic
The project can be found here.
Introduction to the project
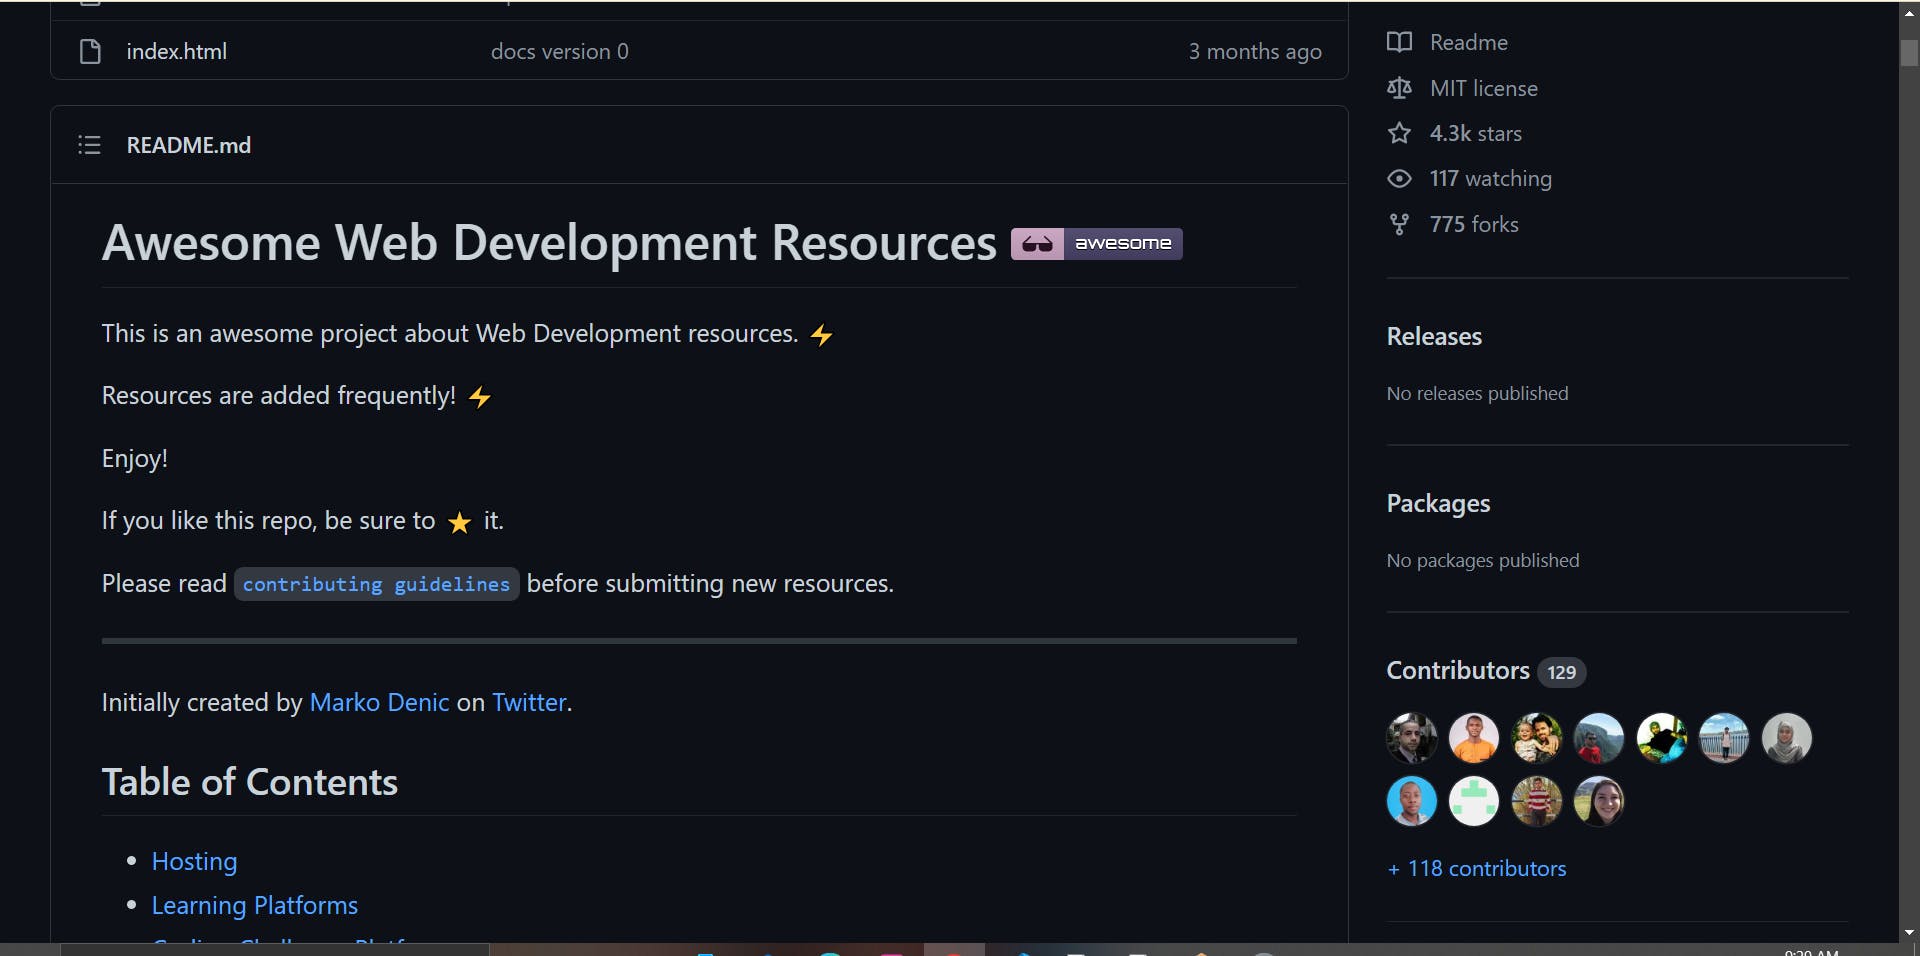
This is an open-source project that contains a list of web development resources.
This is the contributing guide.
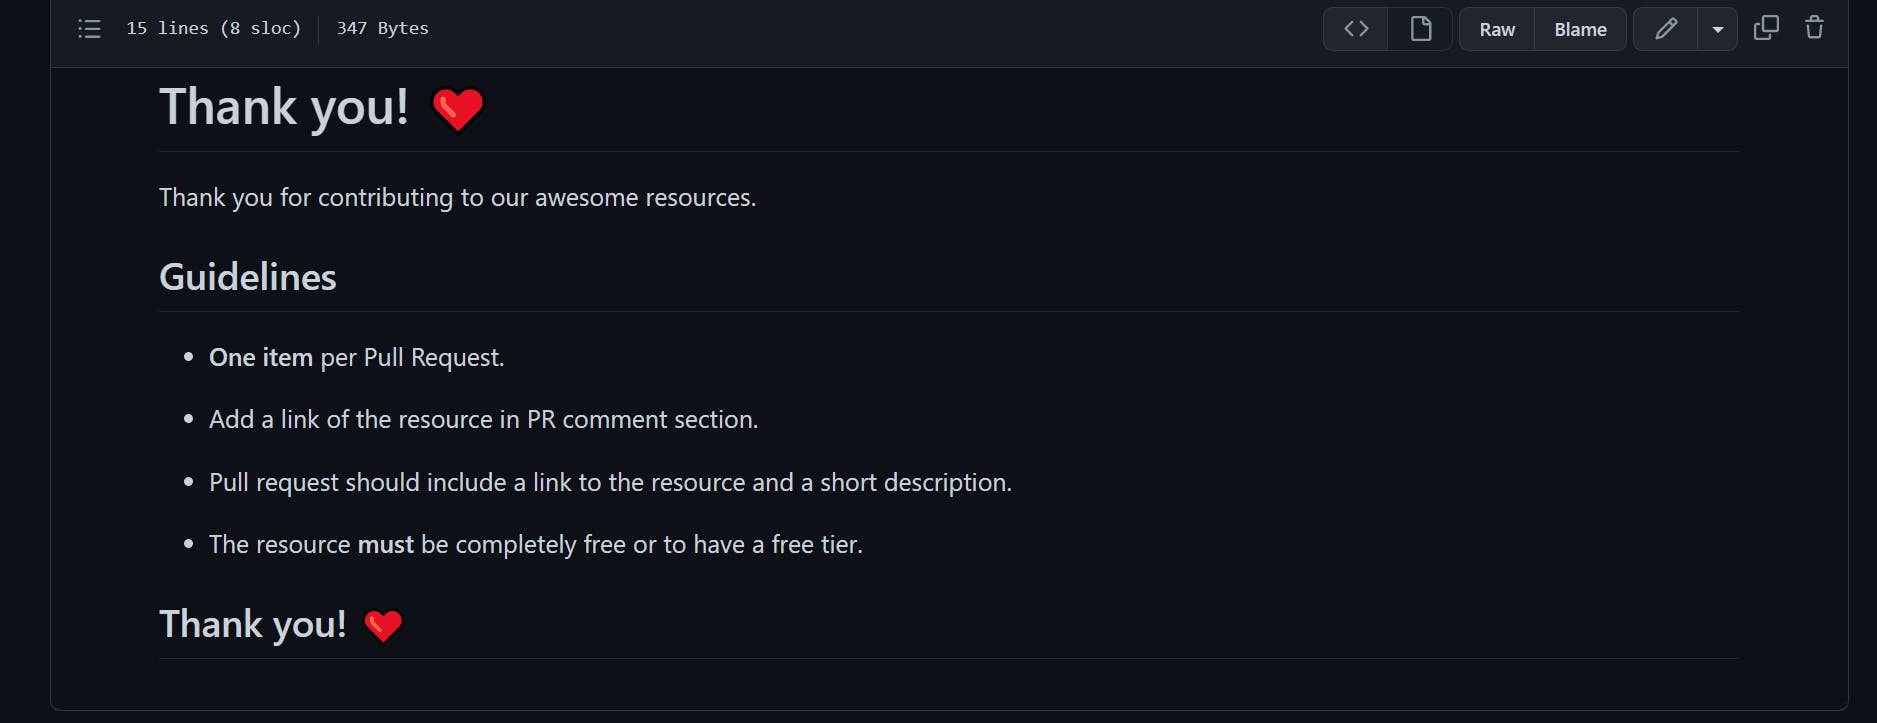
Let's contribute
Forking the project
The first step will be to duplicate the project so that we have our own copy.
A fork is a duplicate of a repository.
When you fork a repository, you can freely experiment with changes without affecting the original project.
Create a fork
- Visit the repository
- On the upper right corner, click fork.
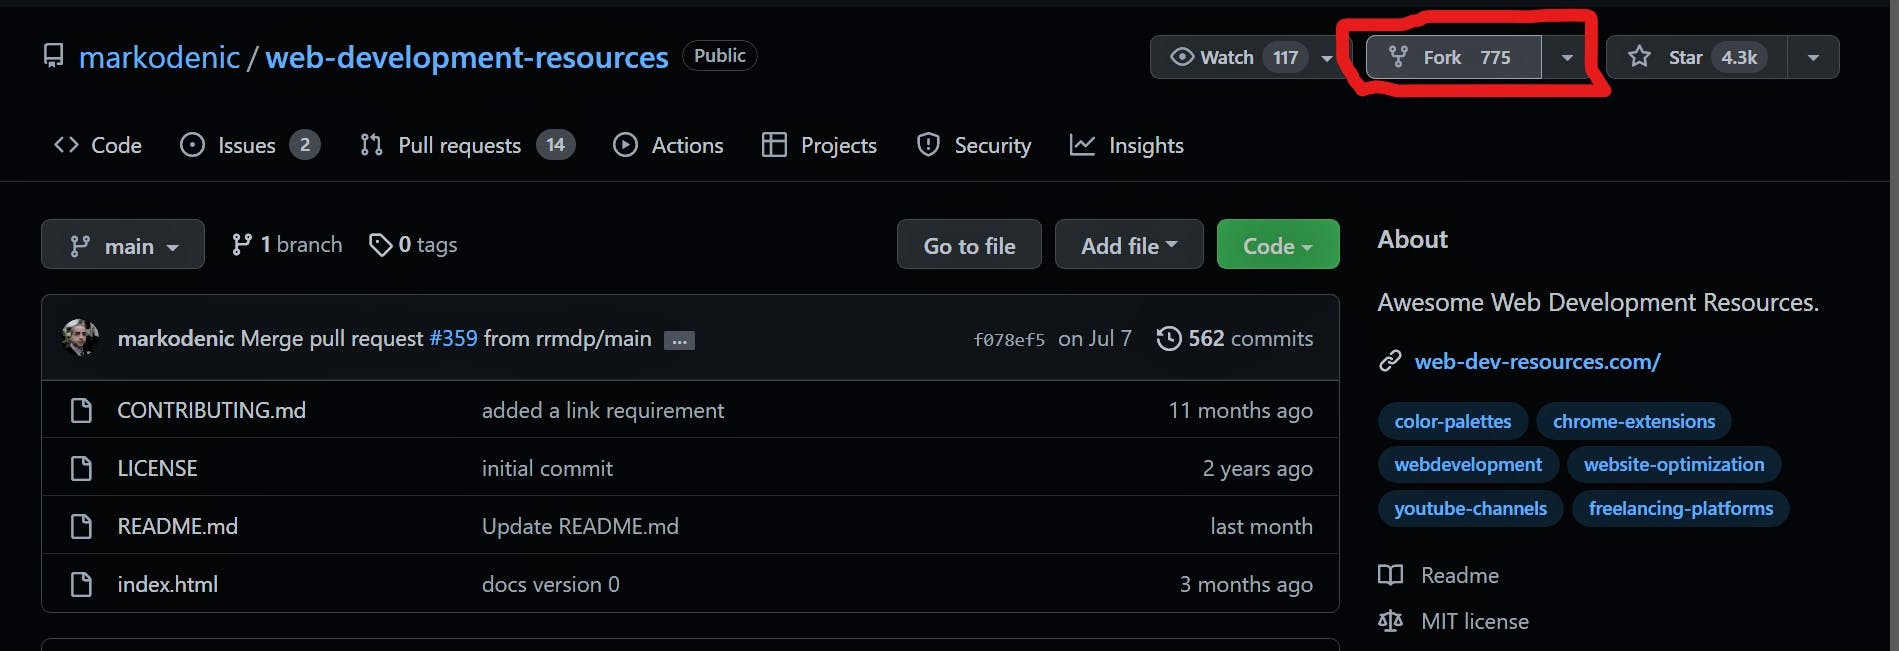
- Create a fork with your account
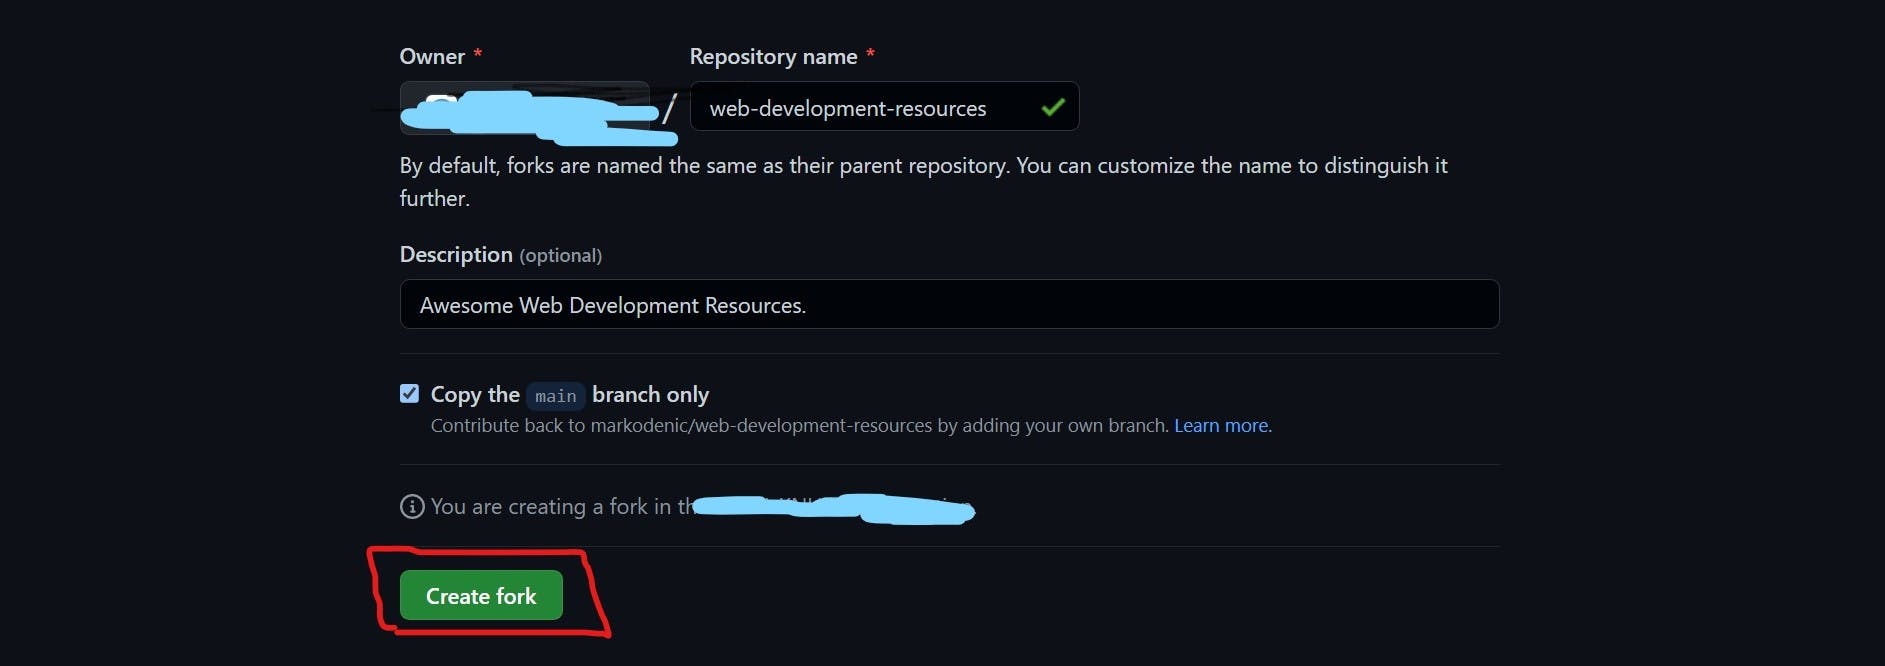
It is important to note that changes made in this fork must be merged to the "original copy" before they are reflected. We'll get to that in a minute.
- With this completed, we can launch VS Code and begin contributing to the project.
Adding our contributions
We'll handle all of the logic in VS code rather than writing long git commands in the terminal. (which is extremely simple)
However, for each simple maneuver that we perform in VS code, I will provide an alternative git command that achieves the same results.
1. Cloning our forked repository
In this case, we're downloading a copy of the forked repo to our local machine so that we can make changes.
Ascertain that your VS Code is linked to your Github account so that you can access all of your repositories.
Click the Source Control icon in the left sidebar to clone the repository.
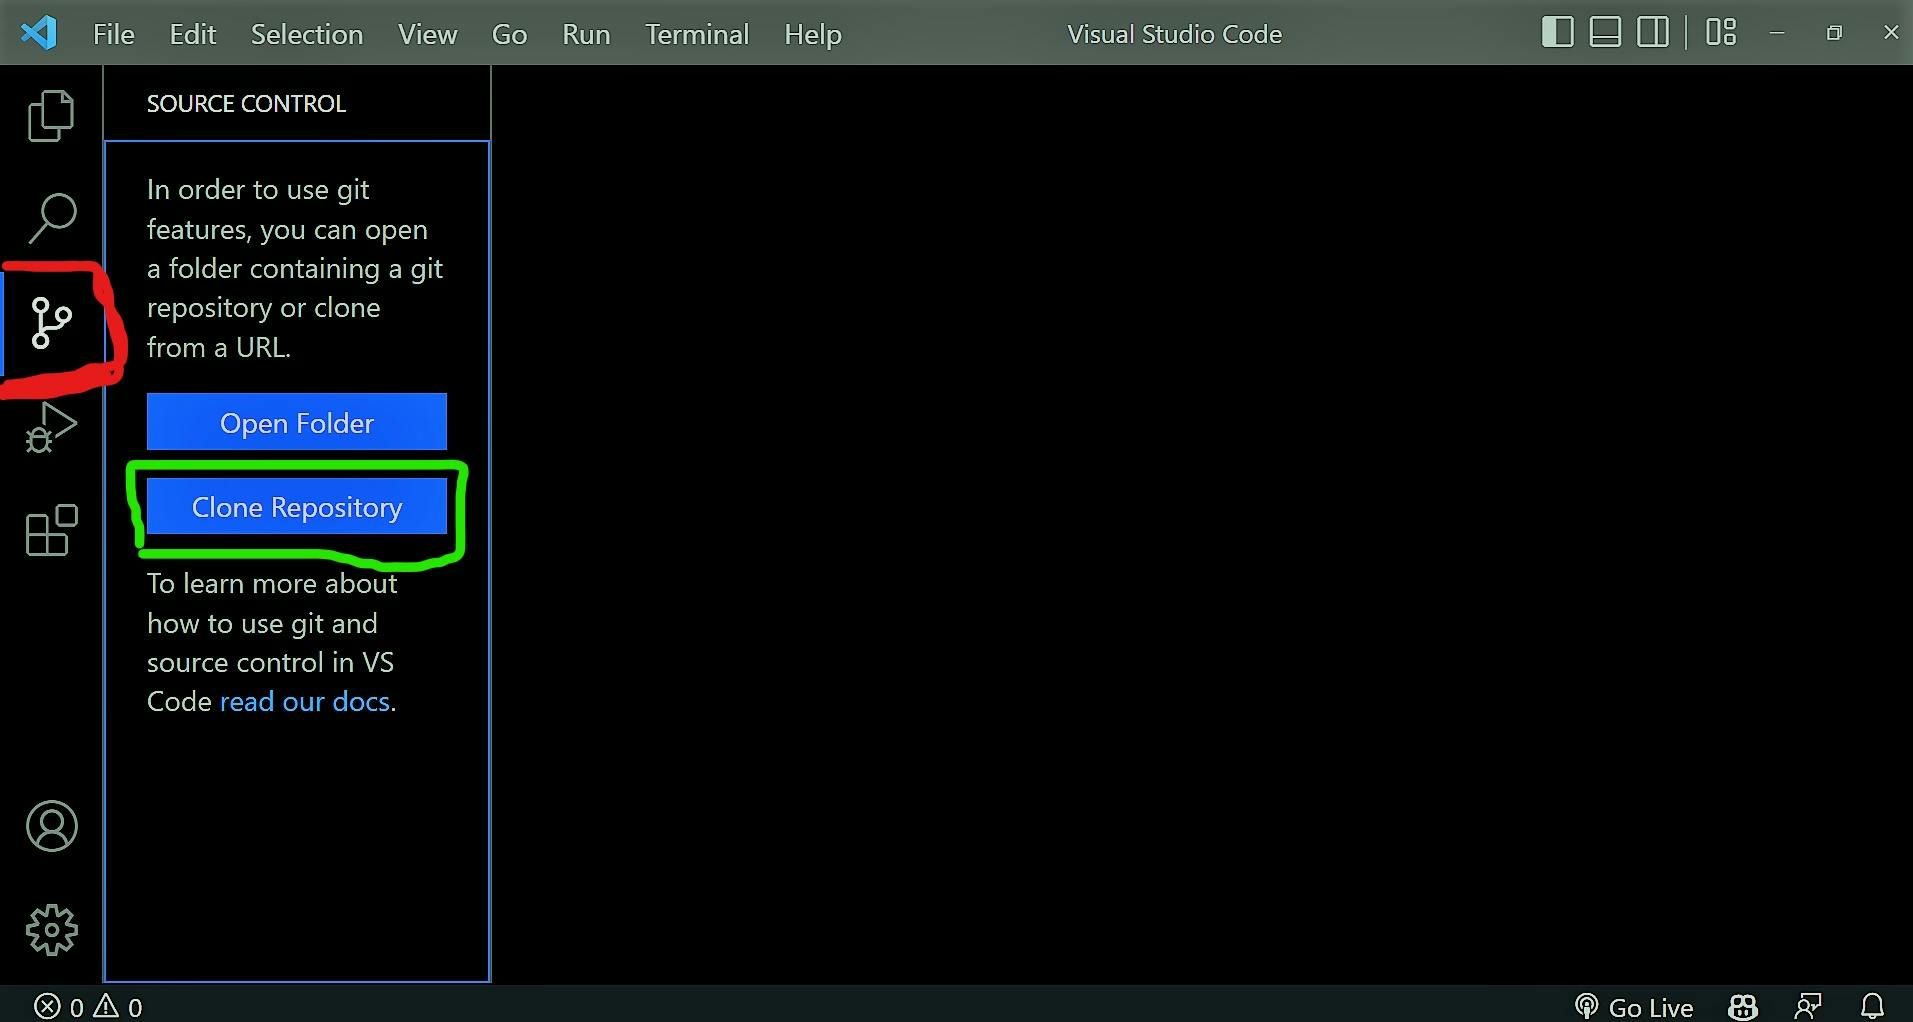
- Select, clone, and save the repository on your local machine.
- Open the repository on VS Code.
Alternatively, you can run
git clone <url of the repository>in the terminal
2. Making changes
- Open the README.md file, which contains all of the resources.
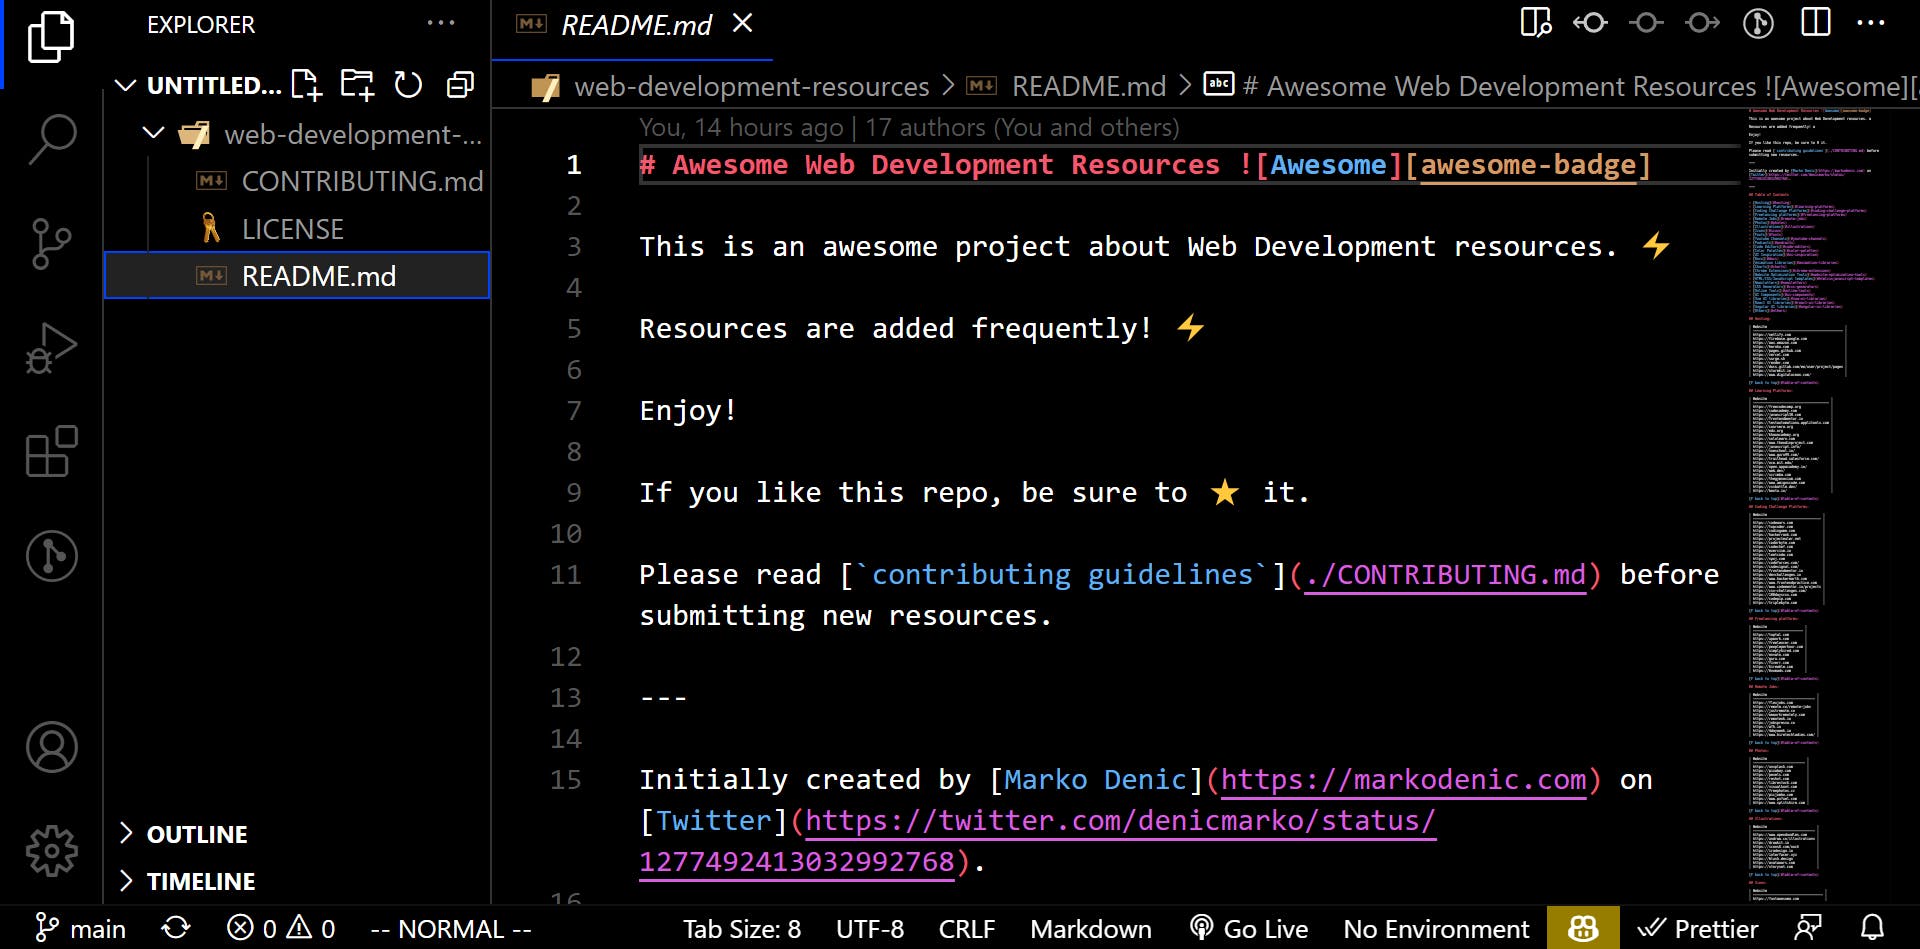
- Make your contributions
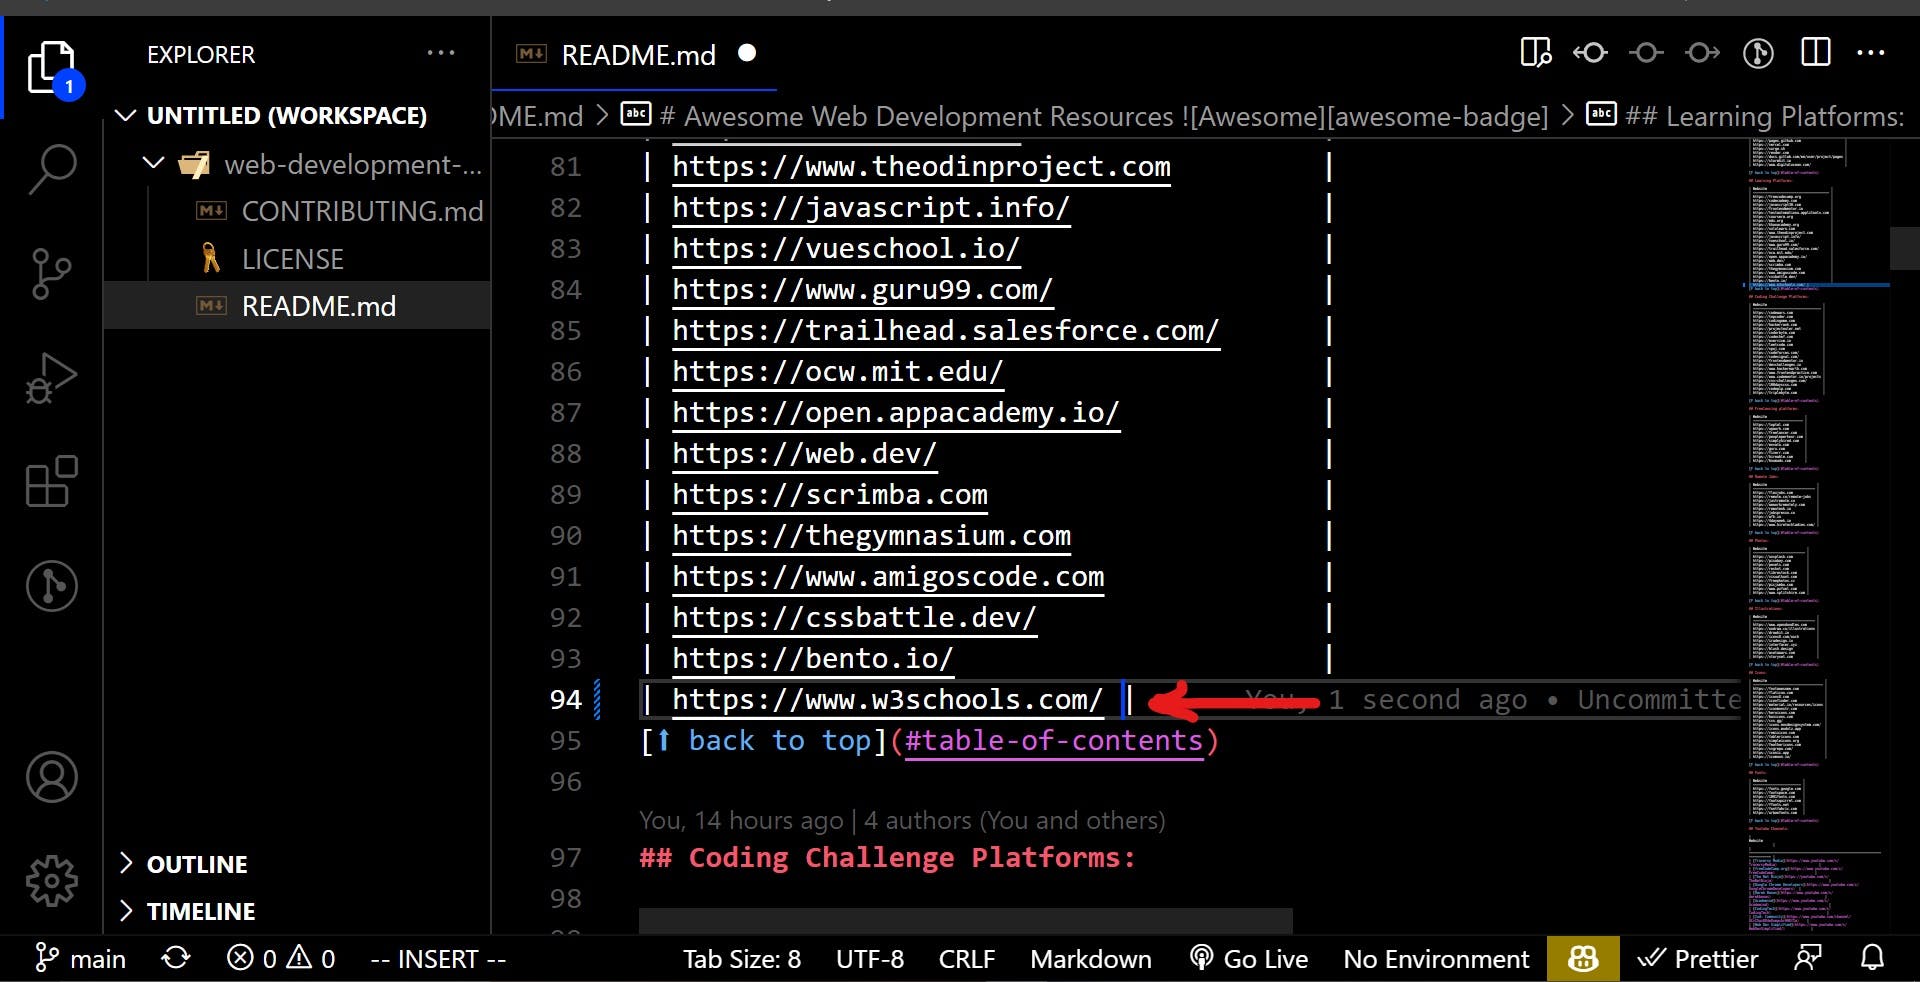
I contributed by adding w3schools to the resources on line 94. Find a free internet resource and include it.
3. Commit your changes
The "commit" command in Git is used to save changes to the local repository.
A commit message describes the modification you made to your project. So let's do it in Visual Studio Code.
- Click the Source Control icon in the left sidebar once more.
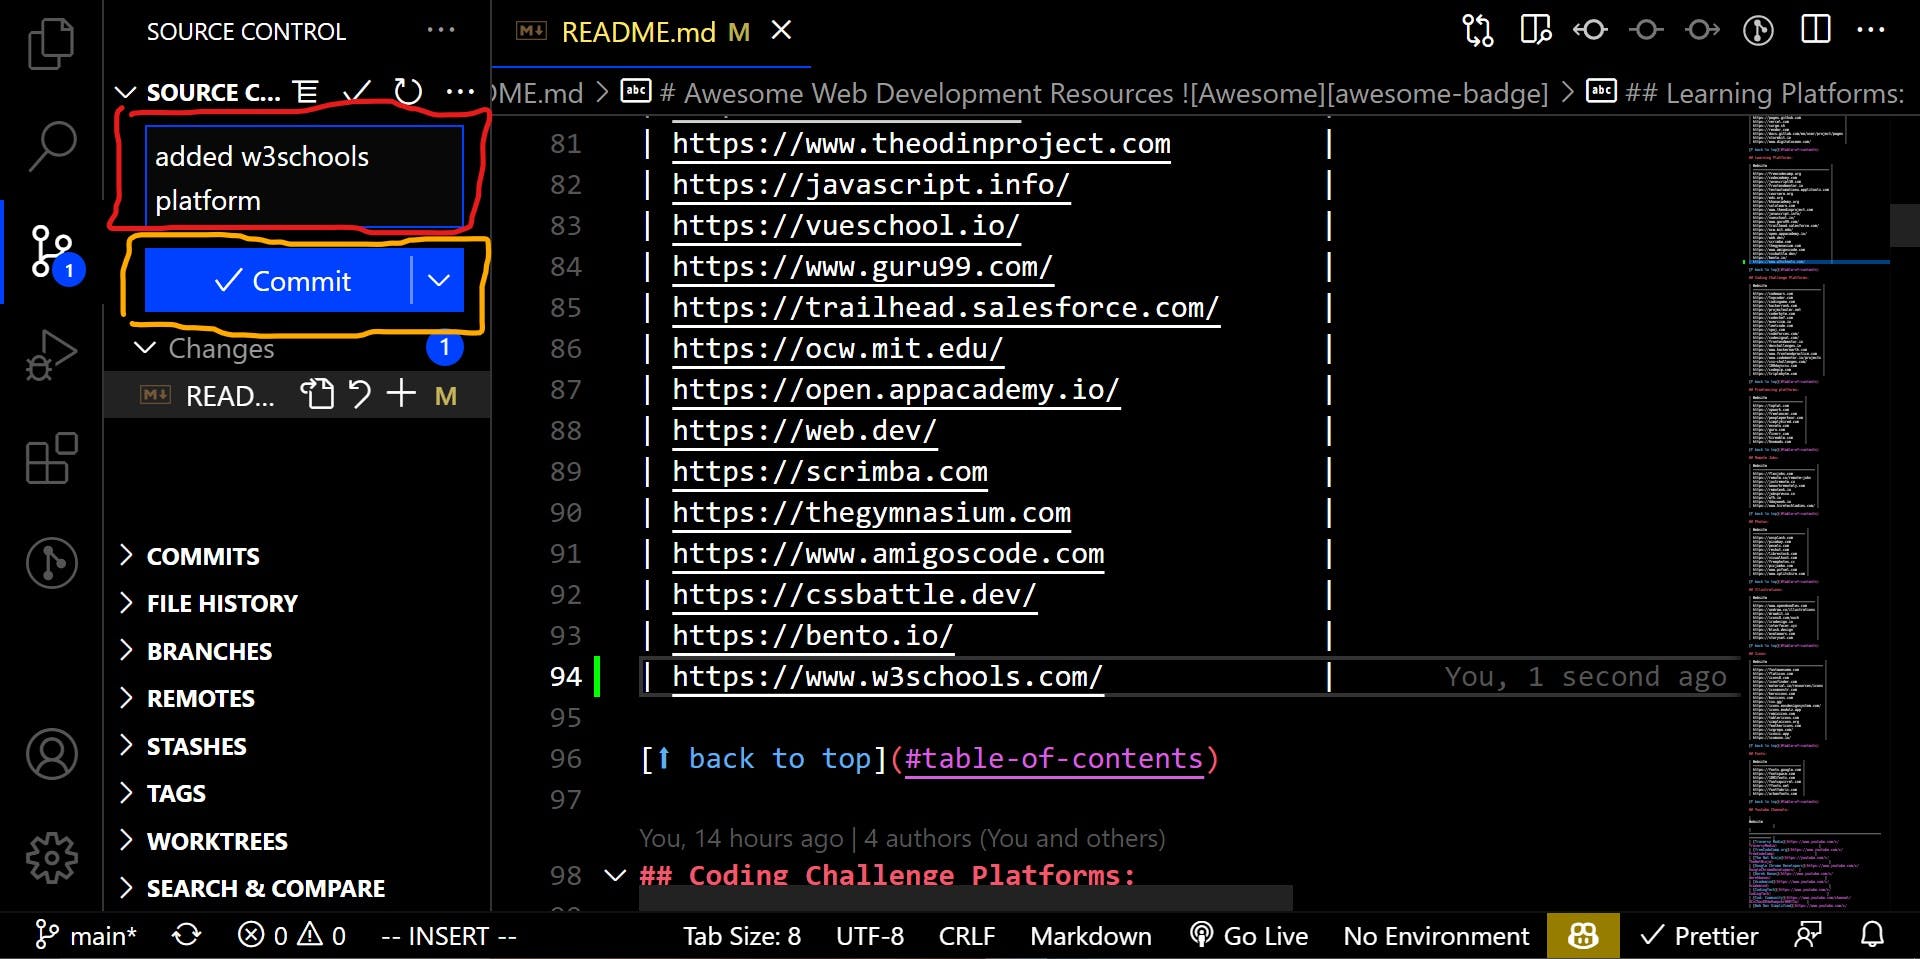
- By clicking commit, you are one step closer to syncing all of your changes to your forked Github repository.
Alternatively, you can run
git add .followed by agit commit -m "<your commit message>"in your terminal to commit all your changes.
4. Syncing/Pushing our changes to the forked repository
After making and committing changes to our local repository, we can push it to the remote forked repository Github.
- Click the Source Control icon in the left sidebar once more and sync your changes.
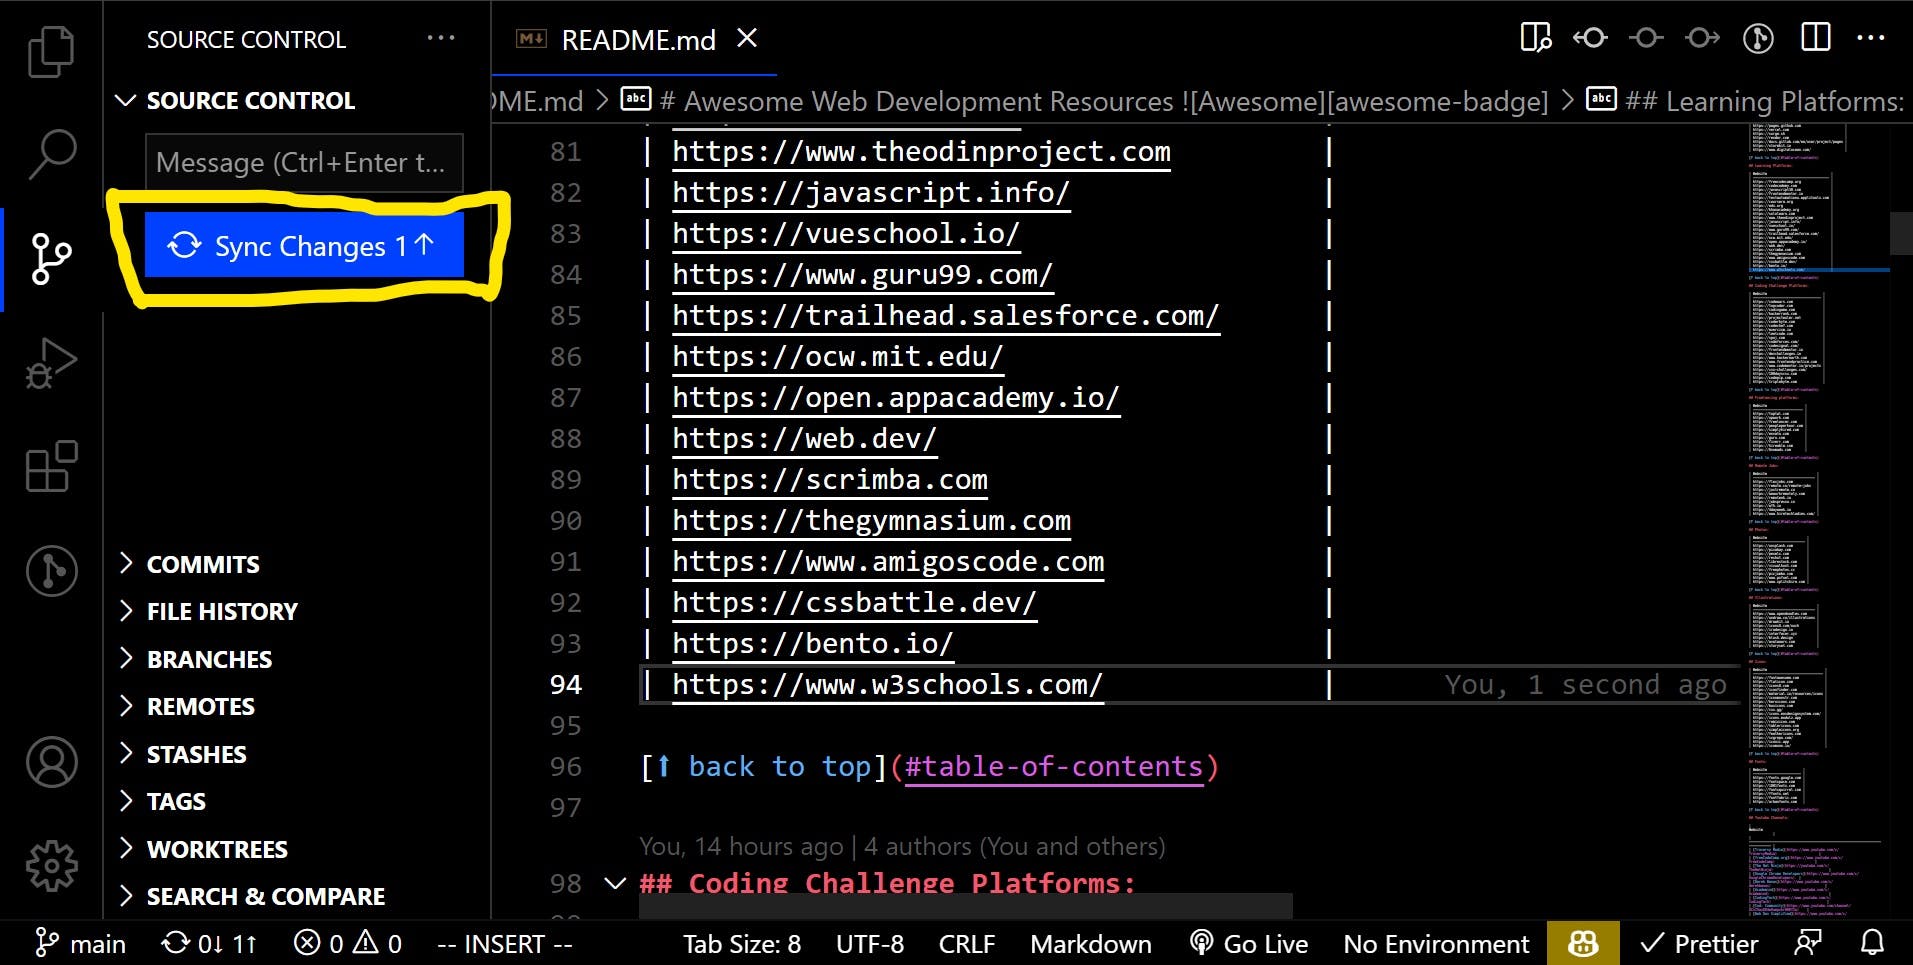
Alternatively, you can run
git pushin your terminal to push to the forked repository.
After successfully making changes to the forked repository, we will open Github and create a pull request to have our changes merged.
Creating a pull request
The final step is to submit a request for our changes to be merged.
- Open your forked version of the repository. You will appreciate your recent commit to the repository.
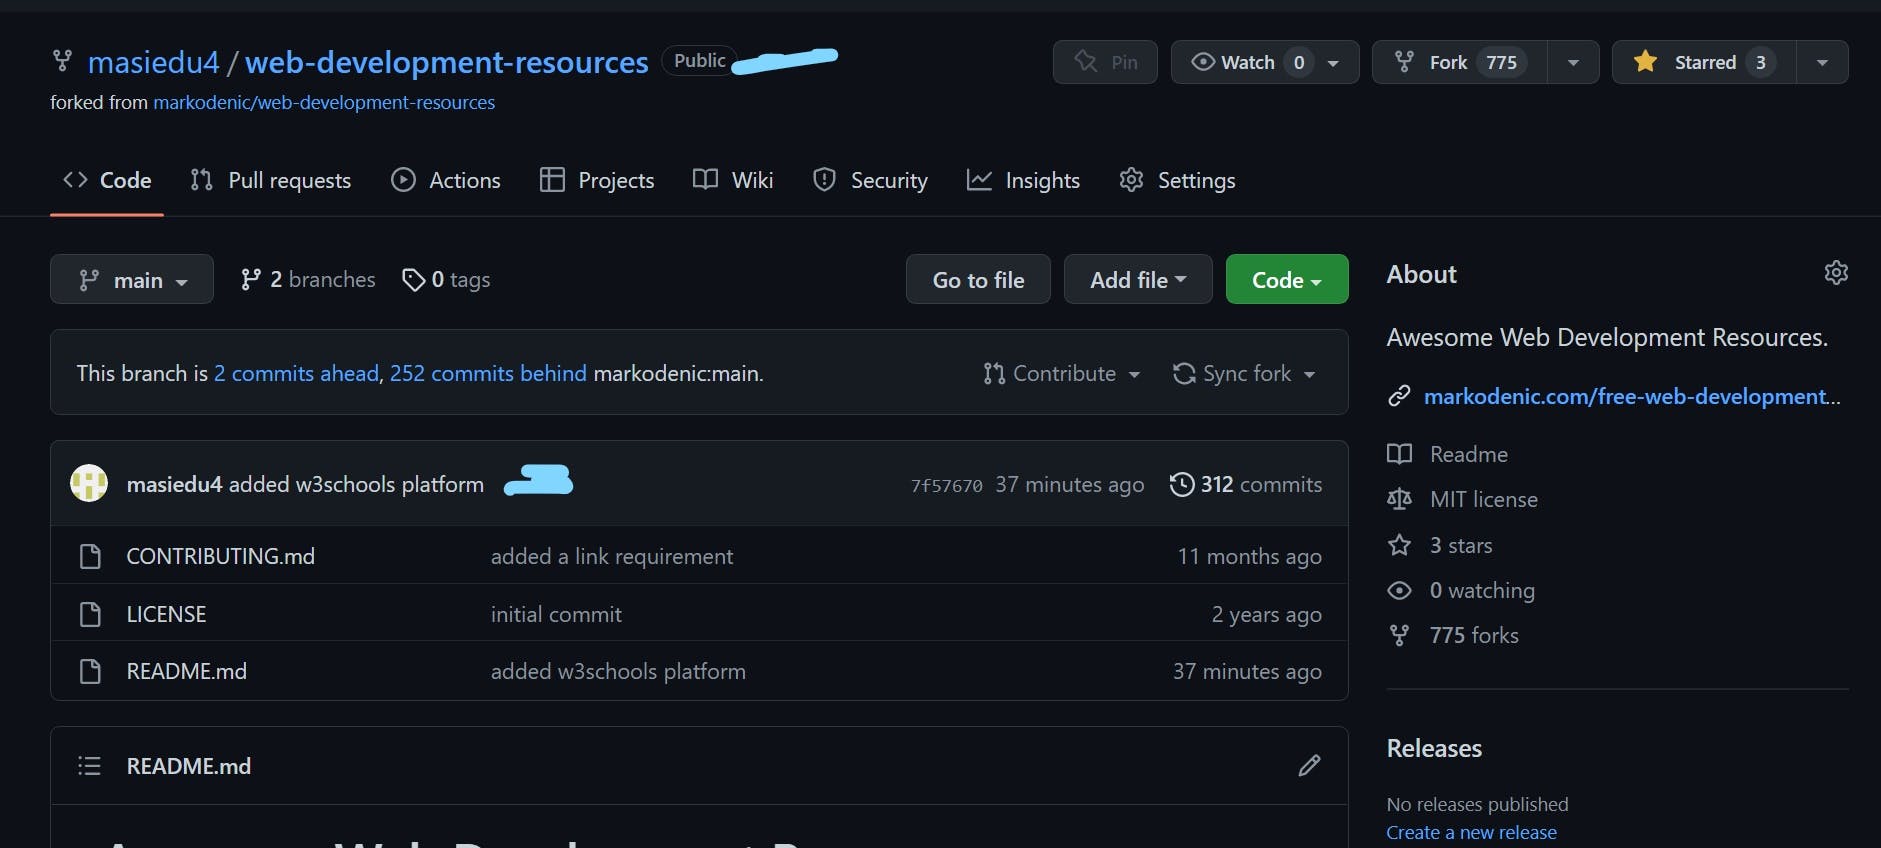
- Visit the pull request tab to create one.
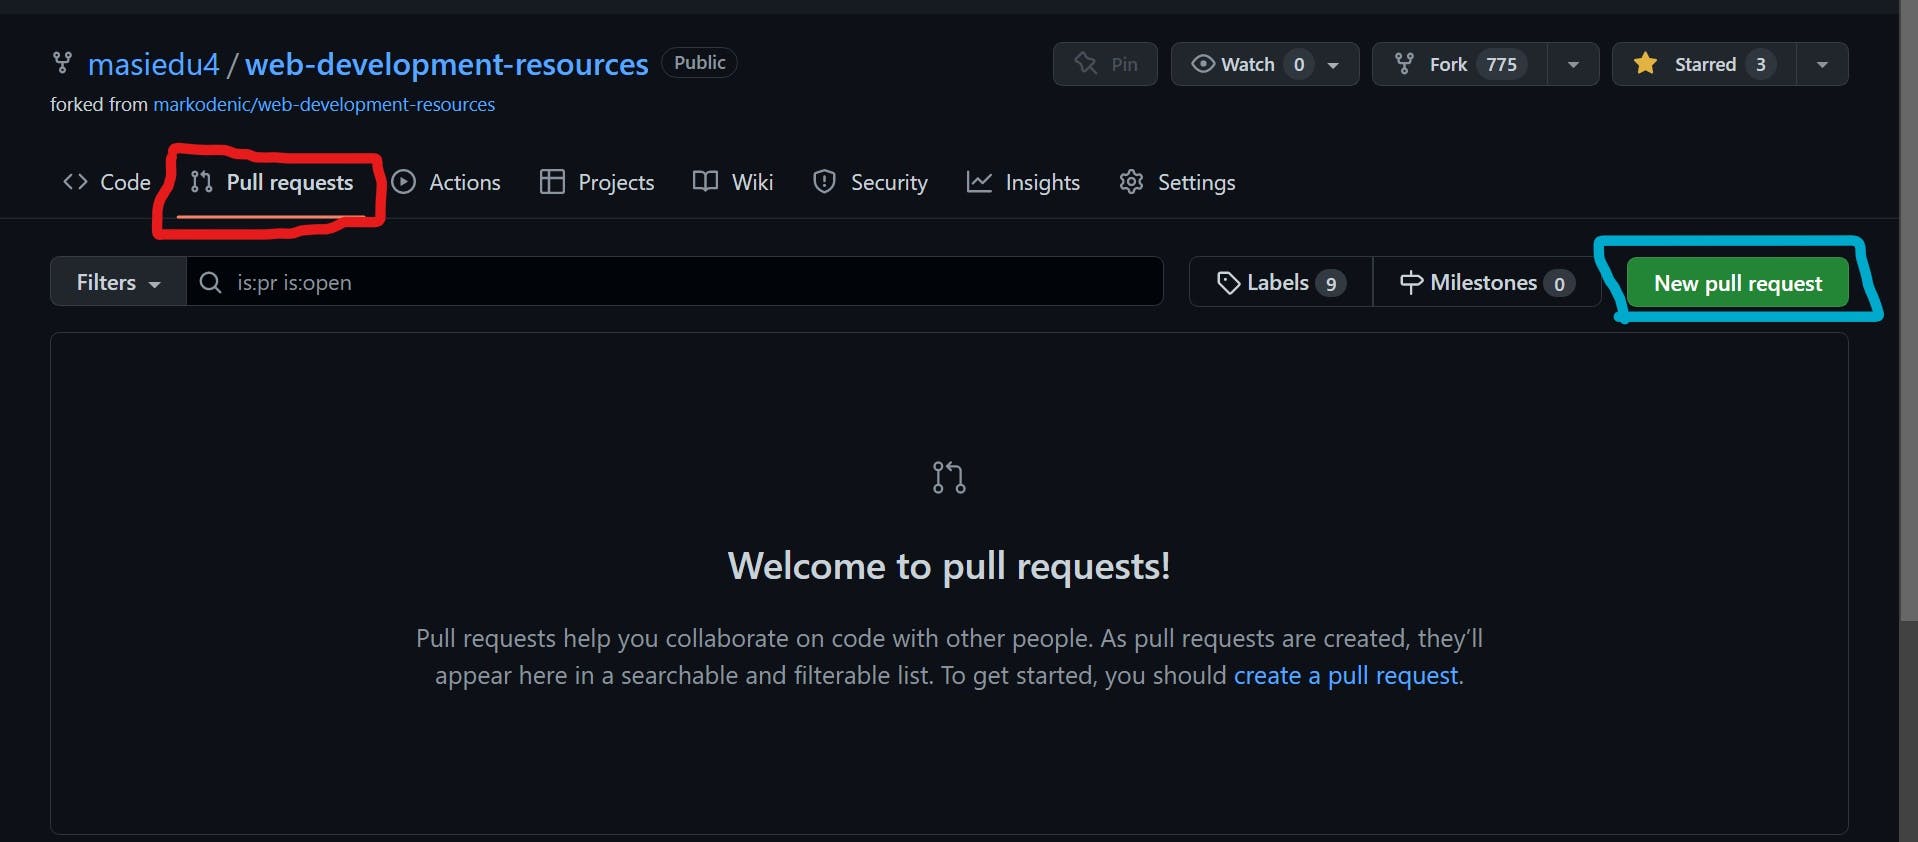
- Follow through and submit your pull request!
Congrats! You have successfully made your first open-source contribution!
Leave a comment and let me know what you contributed. Au revoir!
Learn More
This blog is dedicated to educating curious individuals who want to learn about technology and improve their skills.
Check out the blog to show your support.

